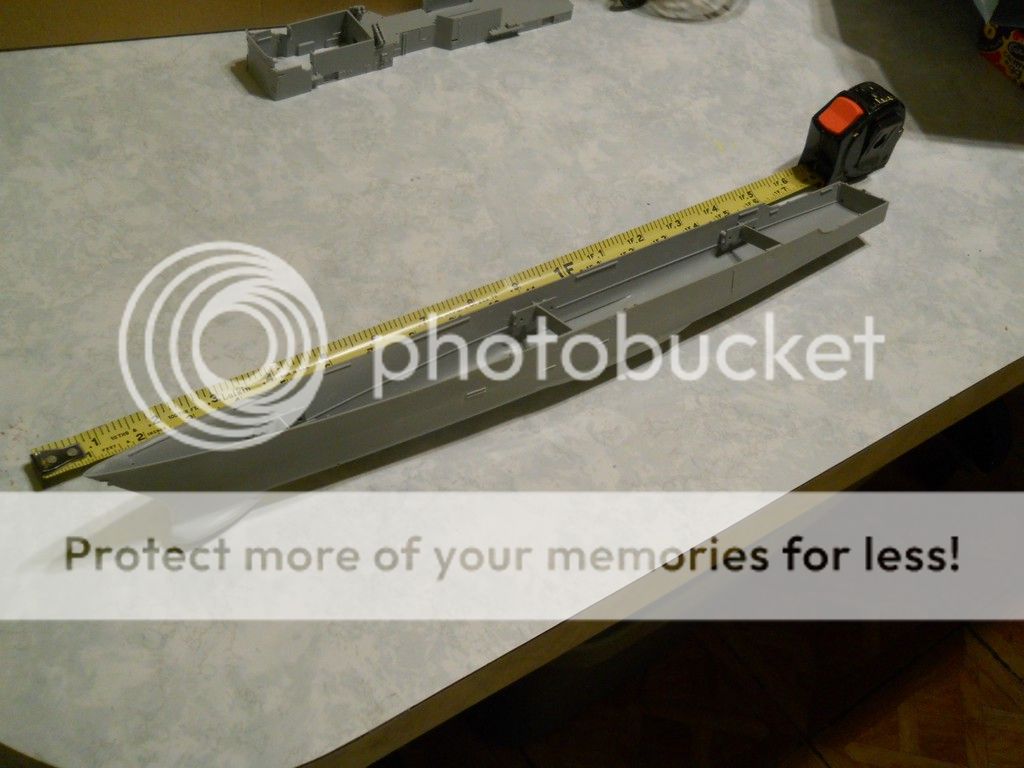
I was contracted to do this prior to my "new years' resolutions" so now that I have received the commission kits, they take precidence over anything else I'm building. Great actually, as I'm getting burned out on 1/700th scale... The first item of business is a 1/350th scale USS Spruance destroyer kit by Dragon. The kit will be built for a disabled veteran who served on board the USS O'Bannon in 1993. This means a pretty clean kit as O'Bannon didn't change drastically until the end of the decade. Here's the hull put together with internal bracing and bulkheads. The hull plastic is scored to allow separation for waterline displays.
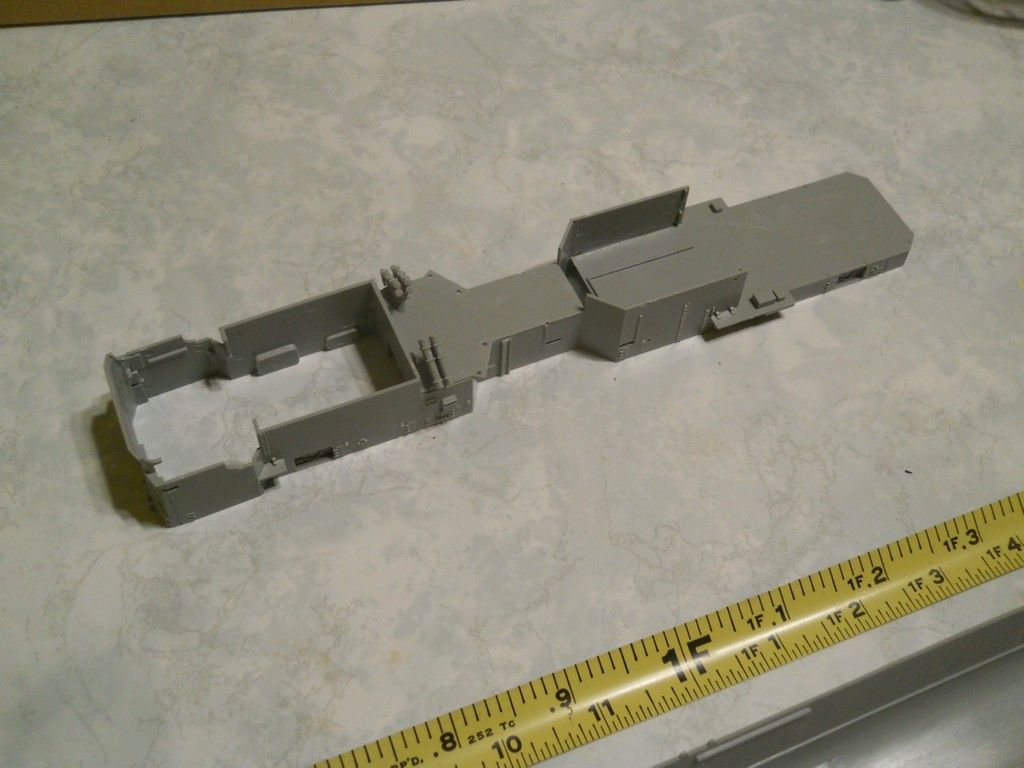
Here's the main superstructure walls assembled and ready for attaching to the hull deck. She will be a flight one Spru-can with ASROC launcher and her sensors will be pretty basic as well. She will be incredibly clean which will actually be a challenge as there won't be a ton of sensors to hide stuff.
The kit is the late Cold War release for USS Cushing which has all the bells and whistles. We actually need to go back in time so the customer is purchasing the Veteran Models ASROC launcher for me as well as some photo etch.
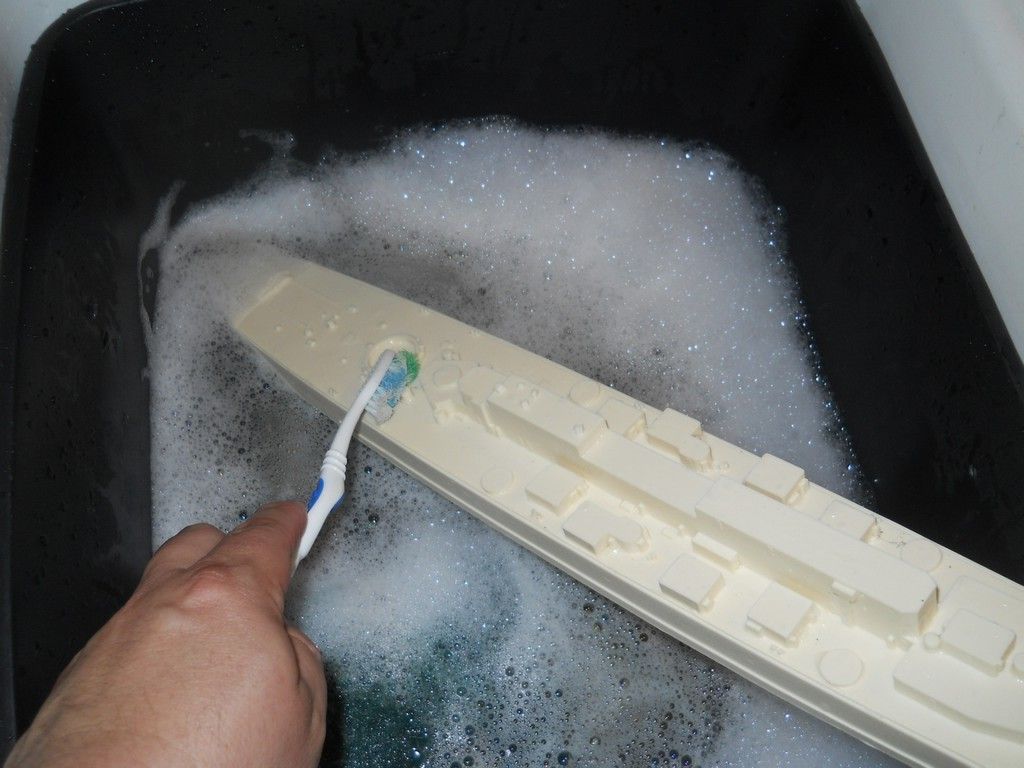
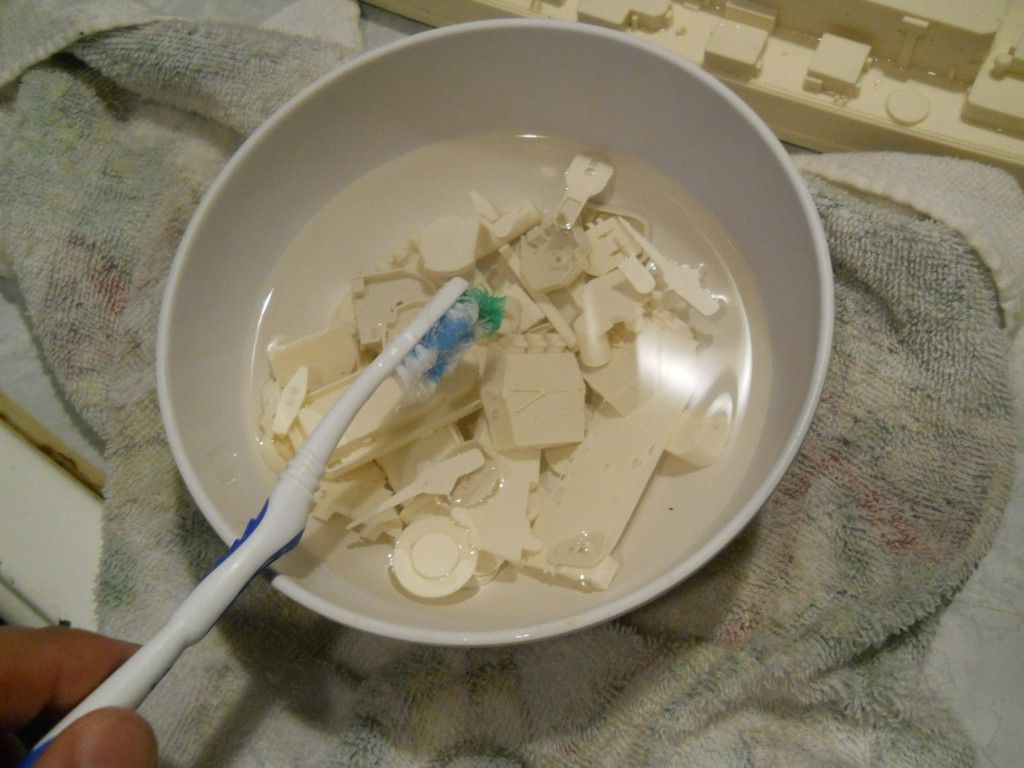
And now some resin for a veteran who served on board the USS Des Moines in 1961. This is the Yankee Modelworks resin kit of USS Salem which is a Des Moines Class cruiser. Scrubbing the release agent off of the ship hull. Upper and lower hull need to be soaked in dish soap to remove the release agent. The release agent serves the same concept as Pam or grease on a cake pan. It helps the resin part pop out of the mold. Some companies use easily disolvable release agent and others don't. So you have to soak the parts to be safe. An old toothbrush gets into hard to reach places.
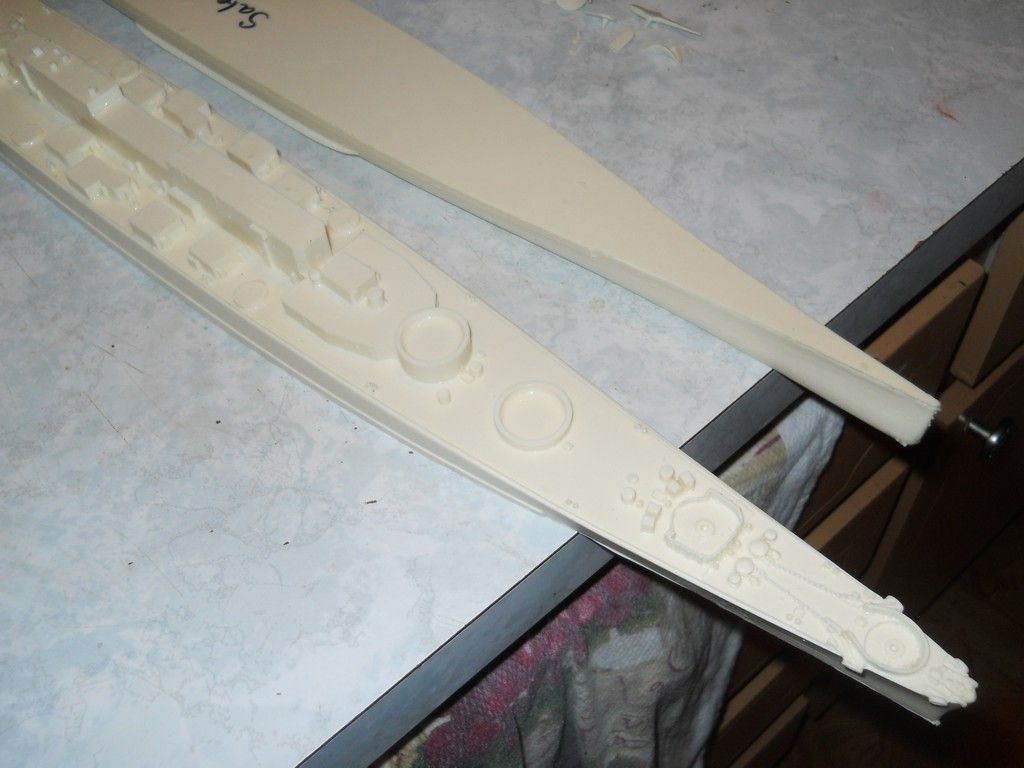
Here's the freshly scrubbed main parts: upper hull and lower hull. Both parts are expertly cast and mate well during test fitting. If they didn't, we'd need to bake the lower hull for twenty minutes at 150 to bend it to shape. That's one of the advantages to working with resin. On a plastic kit, if the hull parts didn't fit, you'd be out of luck. Just be sure to tell the wife/girlfriend what you're doing tho, so that don't see the oven on and decide to "up" the temperature.
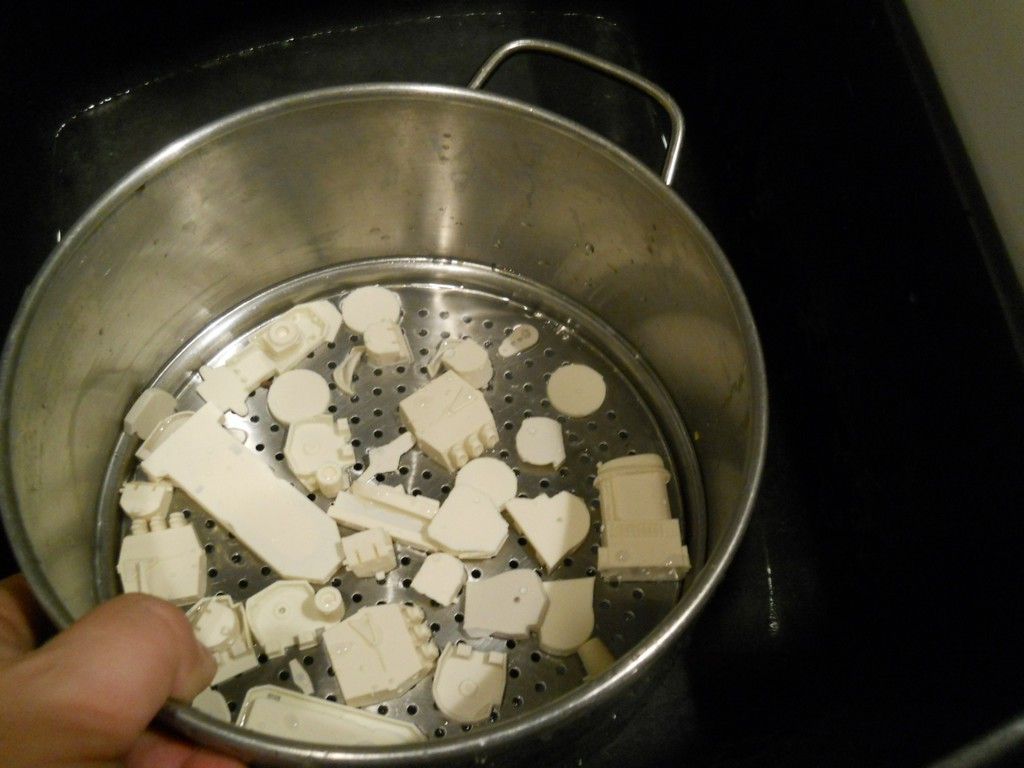
Here's the rest of the resin parts getting an individual soaking in dish soap. I use a collander/strainer so that way I don't lose any parts. Each of the individual parts needs to get the release agent removed as well. Basically anything resin. Overnight soaking does the trick with luke-warm tap water. The agent is pretty easy to work with as it is slimy. So if the parts still feel slimy, you need to add more dish soap...
With all of the release agent now removed, it's time to rinse the parts with cold water and allow them to air dry. Once dry you can check them to see if they are still slimy or smooth to the touch. What's the big deal? Well if you don't have the release agent removed completely you can get problems getting glue and paint to stick to the model. This is the only really time consuming part of the entire process (as far as resin model kits go).
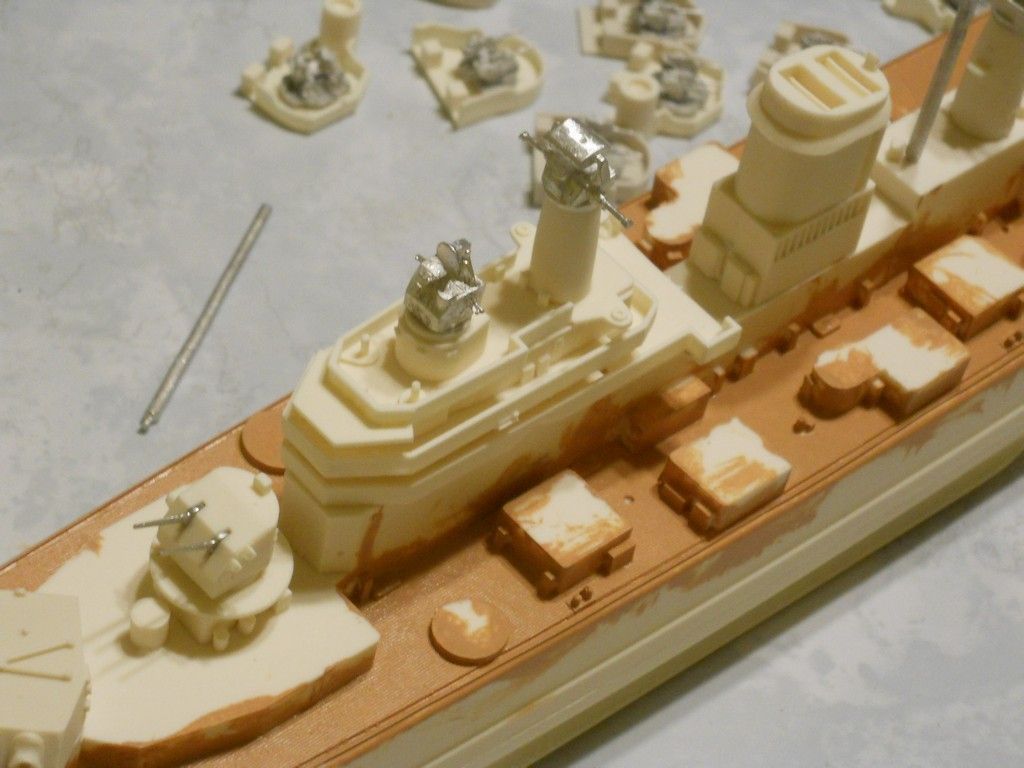
Successful agent removal means we can start putting base coats down. First is a color called deck tan which replicates the post-WW2 U.S. Navy wooden deck color. Here we have the fourth coat applied. Once it's dry we can start painting the individual parts on the deck like lockers, hatches, vents, etc. The superstructure and bridge are not glued on at this point, they are just sitting on the kit to give an idea of the basic shape.
A lot of resin kits come with tiny parts made of white metal (a type of pewter consistency metal) which need to be cleaned up, scrubbed and also made ready to work with. The primary problem with these parts is that they bend easy because they are made of soft metal. Here are some of the ship's twelve anti-aircraft mounts (twin 76.2mm guns) and they are sitting loosely (not glued) in the gun tubs.
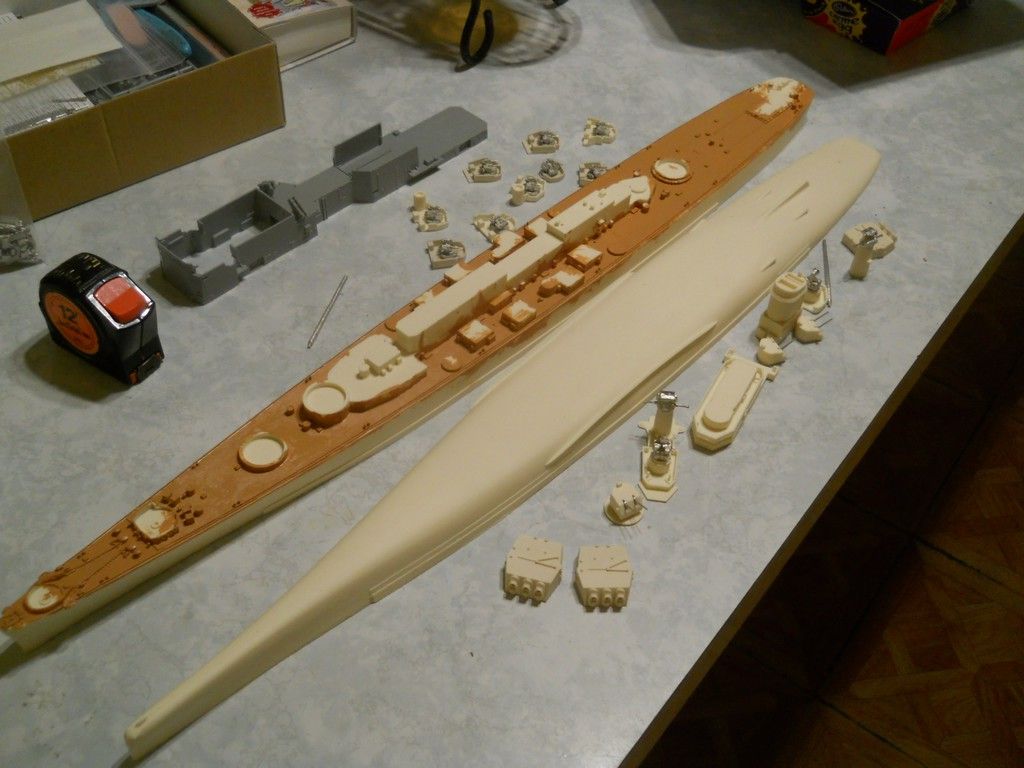
Here's a close up of the forward superstructure/bridge parts. These are not glued on at the moment, they are just sitting here for reference. Once the white metal parts are all done, then it's time to start putting on brass railings and the rest of the resin parts. Resin kits themselves have a low part count. They build in to the basic shape rather quickly. The real time consuming portion will be putting all of the brass ladders, hatches and radars on.
Here's a closing shot of my weekend's work thus far. The two hull halves are not glued together at this point. The lower hull will eventually need to be attached to the bottom hull. This will be done via careful glueing and curing. It's off at the moment because there will be some modifications I'll need to make to it depending on the display method chosen for the finished model.
By the way, this is a two foot/two inch long piece of resin and weighs a ton. This kit is not for the timid or weak of spirit...
You make dealing with all those "fiddly bits" look actually fun. And you're right: 350-scale does certainly have some refreshing differences from 1:700!